Converting TradingView Alerts into Automated Trades.
I still remember the exact moment I hit my absolute breaking point. It was exactly 3:17 AM on a freezing Tuesday morning. Furthermore, I was staring intensely at my glowing laptop screen with burning, bloodshot eyes, desperately waiting for a specific Forex trading indicator to finally cross over. Consequently, sheer exhaustion took over, and I face-planted onto my keyboard, falling sound asleep right there at the desk. Naturally, when I woke up a few hours later, the perfect setup had already triggered, and I completely missed out on a massive, account-changing move. Sadly, I felt utterly sick to my stomach. ❤️ Have you ever been there?
If you are reading this, I am willing to bet you know exactly what that heartbreaking frustration feels like. For example, you spend countless hours analyzing charts, drawing precise lines, and meticulously planning your entries. However, life always seems to get in the way. Specifically, your boss calls you into a useless meeting, your kids need your attention, or your body simply demands sleep. As a result, the market leaves you behind. But what if I told you there is a magical way to clone yourself? In other words, you can make your computer execute your trades exactly as you want, completely hands-free. ✨ Today, we are taking a deep dive into the incredible world of converting TradingView alerts into automated trades. Therefore, grab your favorite cup of coffee, take a deep breath, and let us embark on this life-changing journey together.
Step 1: Grasping the Magic of Webhooks 💡
Before we start clicking buttons, we truly need to understand how the underlying magic works. Imagine TradingView as an incredibly smart, observant lookout standing on top of a tall mountain. Whenever this lookout sees danger or an opportunity, they need a way to shout down to the village below. In the digital world, that shout is called a Webhook. Specifically, a Webhook is just a simple, instant message sent from one computer to another over the internet. Therefore, when your favorite Forex trading indicator flashes a buy signal, TradingView instantly fires off a Webhook to your chosen broker. Consequently, your broker receives that hidden message and instantly executes the trade on your behalf. Interestingly, this entire process happens in less than a single second. Furthermore, you do not need a computer science degree to make this happen; it is surprisingly simple once you see the mechanics in action.
Step 2: Choosing Your Trusty Automation Bridge 🌉
Now, TradingView cannot talk directly to most basic broker accounts out of the box. As a result, you need a translator, which we lovingly call a bridge. For instance, popular tools like PineConnector, 3Commas, or Capitalise.ai serve perfectly as this vital middleman. Personally, I remember the overwhelming feeling of browsing through dozens of these services. However, you only need to look for three main things: speed, reliability, and ease of use. Specifically, if you are trading the traditional markets, PineConnector is often a fantastic, highly recommended choice. On the other hand, if you are a crypto enthusiast, 3Commas might feel like a warm hug. Consequently, your first actionable step is to create an account with one of these reliable bridge services. Once you do that, you are already halfway to reclaiming your precious time.
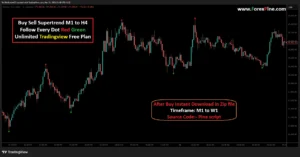
Step 3: Sourcing the Perfect Forex Trading Indicator 📈
Automating a terrible strategy will merely help you lose your hard-earned money at lightning speed. Therefore, you must have an incredibly solid, reliable strategy before automating anything. For example, maybe you rely on a combination of the Relative Strength Index and the MACD. Alternatively, perhaps you have coded your own proprietary system in Pine Script. Regardless of your method, your chosen Forex trading indicator must explicitly print clear buy and sell signals on your TradingView chart. In addition, I highly recommend backtesting your strategy thoroughly. Naturally, seeing a strategy perform well in historical data gives you the immense emotional comfort needed to trust a machine with your capital. Furthermore, do not rush this critical step. Take your time, test your theories, and only move forward when you feel absolute, unwavering confidence in your system’s logic.
Step 4: Connecting Your Broker to the Bridge 🔗
With your bridge selected and your strategy validated, it is time to connect the digital plumbing. Specifically, you need to link your bridge account to your actual trading account. For example, if you are using MetaTrader 4 or 5, you will typically install a tiny Expert Advisor provided by your bridge service. Consequently, this little piece of software silently listens for the incoming signals from TradingView. I know setting up API keys and copying long strings of numbers can feel incredibly intimidating. However, every reputable bridge service provides extremely clear, step-by-step video tutorials. Furthermore, just take it one click at a time. Eventually, you will see a beautiful green connection status light turn on, and let me tell you, the sheer relief of seeing that green light is entirely unmatched. 🚀
Step 5: Crafting the Secret JSON Message 📝
Here is where the real fun begins. When TradingView sends its Webhook alert, it needs to speak a specific language called JSON. Honestly, JSON sounds like a scary tech word, but it is just a simple way to format text. For instance, a basic message looks something like this: Buy EURUSD, Risk 1%, Use Stop Loss. Of course, the actual formatting uses curly brackets and quotation marks. In addition, your bridge provider will literally hand you the exact text template you need to use. Subsequently, all you have to do is copy and paste that template directly into your TradingView alert box. Moreover, you simply change the variables to match your specific desires. For example, if you want to buy 2 lots instead of 1, you just change the number 1 to a 2 in the text. It truly is as simple as filling out a digital Mad Libs puzzle.
Step 6: Setting Up the TradingView Alert 🔔
Now that we have our secret message ready, we must tell TradingView exactly when to send it. First, open your beautifully marked-up chart. Next, find your reliable Forex trading indicator and click the tiny alarm clock icon next to its name. Consequently, a comprehensive menu will pop up on your screen. Here, you must select your specific buy or sell condition. Furthermore, look for the all-important Webhook URL checkbox. You absolutely must check this box! Afterward, paste the unique web address provided by your bridge service into the text field. Finally, in the large message box at the bottom, paste the JSON code you meticulously crafted in the previous step. Click create, and suddenly, your chart is fully armed and operational. ✨
Step 7: The Vital Safety Net of Demo Testing 🛡️
Listen to me very carefully right now. You absolutely must test this entirely on a demo account first! For instance, I once made a tiny typo in my JSON message, typing a 10 instead of a 1. Consequently, my automated bot tried to buy ten times the amount I actually wanted. Thankfully, I was using fake money at the time, so it was just a funny story rather than a financial tragedy. Therefore, let your system run untouched on a paper trading account for at least a full week. During this time, watch the automated trades trigger. In addition, double-check that the stop losses are placed correctly. Moreover, ensure the take profits are exactly where you planned them to be. Ultimately, this crucial testing phase builds the deep psychological trust you need to eventually trade with real, hard-earned cash.
Step 8: Flipping the Switch to Live Trading ⚡
After your demo testing goes flawlessly, that glorious, nerve-wracking day will finally arrive. It is time to go live. First, switch your API keys from your demo account to your real money account. Next, double-check your position sizing one last time just to be safe. Consequently, when you officially enable that live connection, you will likely feel a massive wave of adrenaline wash over you. It is a profoundly weird, beautiful sensation knowing a robot is now officially managing your money. Furthermore, your first live automated trade will feel like watching your child ride a bicycle without training wheels for the very first time. You will be anxious, but incredibly proud. Just remember to breathe and trust the robust system you have so carefully built.
Step 9: Monitoring and Emotional Detachment 🧘
The entire point of automating your trading is to step away from the glowing screens. However, during the first few weeks, you will stubbornly find yourself checking your phone every five minutes. Naturally, this is a completely human reaction. Over time, though, you must practice intentional emotional detachment. For example, let the machine do its job without your constant micromanagement. Furthermore, the true beauty of algorithmic trading is that robots do not feel greed, fear, or exhaustion. Consequently, they simply execute the plan flawlessly, every single time. Moreover, your only job now is to review the overall performance at the end of the week, tweak the parameters slightly if necessary, and then go enjoy your beautifully reclaimed life. ❤️
Ultimately, transforming your chaotic, screen-staring habits into a smooth, automated workflow is one of the most liberating experiences a trader can achieve. I genuinely hope this guide has removed the overwhelming mystery from the process. Yes, there is a moderate learning curve at the very beginning. However, the immense freedom you gain on the other side is absolutely priceless. You no longer have to sacrifice your precious sleep, your family time, or your mental health just to catch a profitable market swing. Therefore, take that crucial first step today. Start experimenting with simple alerts, build your knowledge gradually, and finally let technology do the heavy lifting. You absolutely deserve to trade completely stress-free, and now, you hold the exact blueprint to make that dream a wonderful reality. Happy automating! 🚀✨